

Setting up a Static IP Address
Crosspeer Cloud servers are configured with a dynamic IP address by default. However, sometimes it's useful to have a static IP address - i.e. one that persists between reboots.
Step 1: Purchase static IP
To set up a static IP address, first you'll need to purchase it. If you want to use it for a set length of time, you can buy it as a subscription. If you'd rather pay for burst use, you'll need to have some pre-pay credit in your account.
Step 1: Purchase static IP
To set up a static IP address, first you'll need to purchase it. If you want to use it for a set length of time, you can buy it as a subscription. If you'd rather pay for burst use, you'll need to have some pre-pay credit in your account.
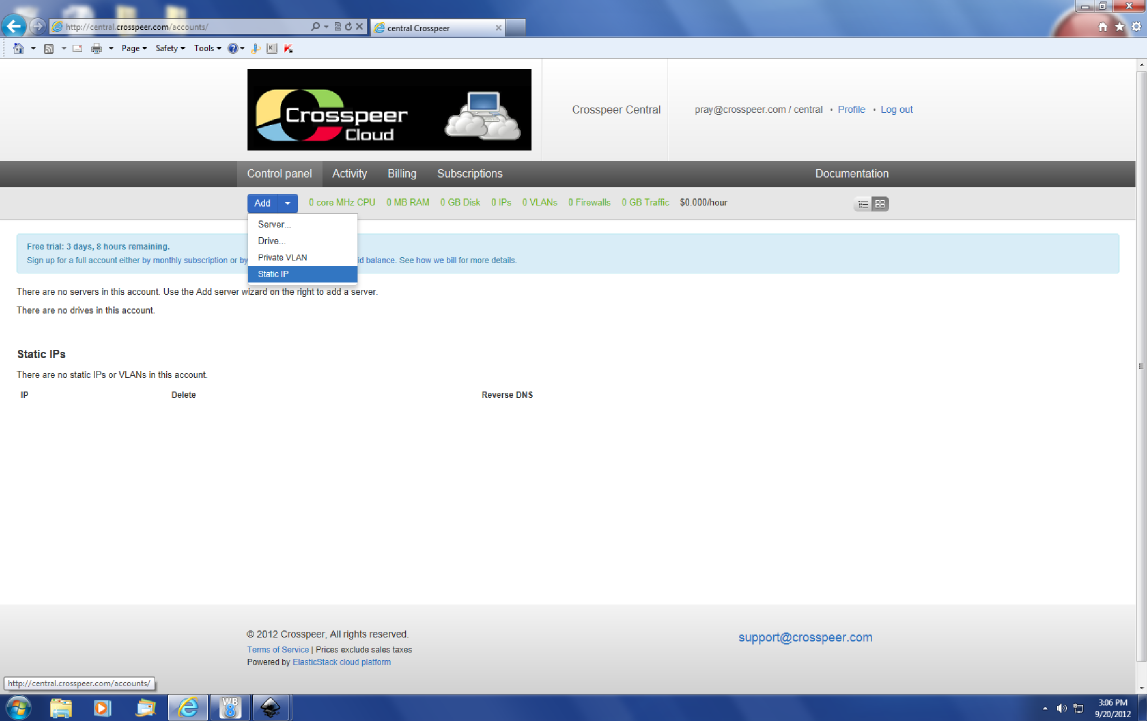
Step 2: Add static IP in control panel
From the Control Panel, click the Add Menu and choose 'Static IP' which will allocate an actual address for you.
From the Control Panel, click the Add Menu and choose 'Static IP' which will allocate an actual address for you.
Step 3: Add a static IP to each server
Finally, shut down your server, click Edit, and configure the static IP in your server configuration:
This is now the primary IP address for the server, but if you want, you can configure additional static IPs inside your server. Static IPs can be removed from your account as easily as they can be added, so take care not to remove IPs that are already in use.
You can also create and manage static IP addresses through the Resource API.
